
Orbit Water Timer Instruction Manual: A Comprehensive Guide
This manual details setup‚ programming‚ and troubleshooting for Orbit timers (96874‚ 96876 series‚ 96954‚ 96956)‚ including the B-hyve smart models‚ for efficient watering.
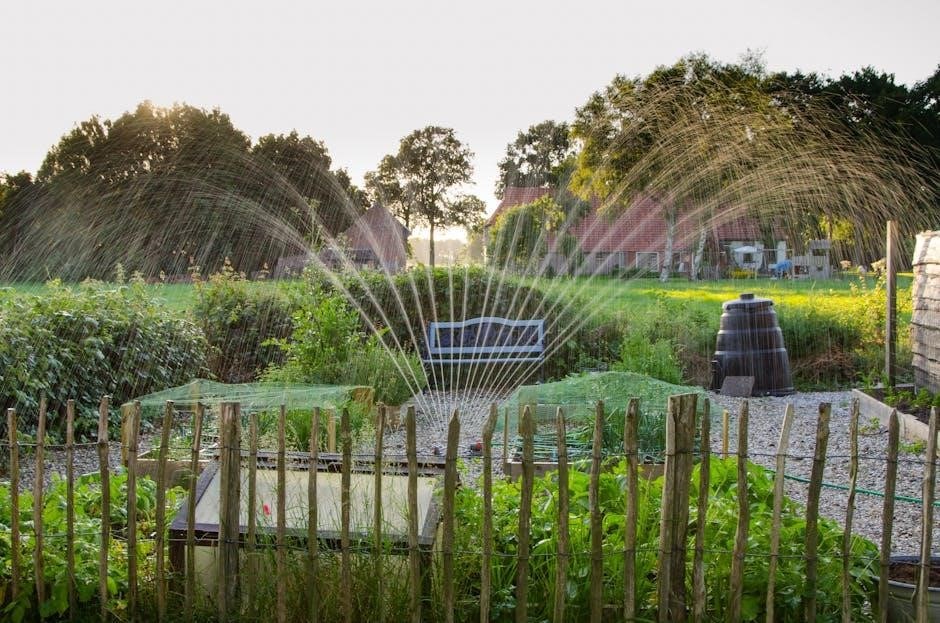
Orbit water timers represent a commitment to simplifying lawn and garden irrigation‚ offering solutions for both basic and advanced watering needs. Designed with user-friendliness in mind‚ these timers empower homeowners to maintain healthy landscapes while conserving water. From the simplicity of the Easy-Set Logic technology found in models like the 96874 and 96876‚ to the smart connectivity of the B-hyve series‚ Orbit provides a diverse range of options.
These timers aren’t just about automation; they’re about control. Users can precisely schedule watering durations‚ select start times‚ and even implement features like rain delay and seasonal adjustments. Whether you’re managing a drip irrigation system or a traditional sprinkler setup‚ an Orbit timer offers a reliable and efficient way to keep your garden thriving. This guide will help you unlock the full potential of your Orbit water timer.
Understanding Easy-Set Logic Technology
Orbit’s Easy-Set Logic technology‚ featured in many of their timers (including models 96874‚ 96876‚ and 96954)‚ streamlines the programming process‚ making it incredibly intuitive. Unlike traditional timers requiring complex button sequences‚ Easy-Set Logic utilizes a straightforward‚ dial-based interface. This allows users to quickly set the current time‚ watering duration‚ and start times with minimal effort.
The core principle revolves around a logical flow – time‚ duration‚ start time – mirroring the natural thought process of setting a watering schedule. This design minimizes confusion and reduces the learning curve‚ even for those unfamiliar with irrigation timers. It’s a user-centric approach that prioritizes simplicity and efficiency‚ ensuring anyone can easily manage their watering needs.
Timer Models Covered (96874‚ 96876‚ 96876-24‚ 96954‚ 96956)
This instruction manual provides comprehensive guidance for several Orbit water timer models‚ ensuring broad applicability for users. Specifically‚ it covers the 96874‚ a standard electronic timer‚ alongside the 96876 and its variant‚ the 96876-24‚ offering extended programming capabilities. The 96954 and 96956 models‚ also included‚ represent further iterations with potentially enhanced features.
While core functionality remains consistent across these models due to the Easy-Set Logic technology‚ slight variations in button layout or specific programming options may exist. This manual aims to address these nuances‚ providing clear instructions for each model. Users should refer to the diagrams and specific sections relevant to their particular timer for optimal setup and operation.
Setting Up Your Orbit Water Timer
Proper installation involves connecting the timer to your faucet and irrigation system‚ followed by battery installation for initial operation and programming readiness.
Initial Installation & Battery Installation
Before connecting to water sources‚ carefully unpack your Orbit Water Timer and inspect all components for any shipping damage. Locate the battery compartment‚ typically on the timer’s face or side‚ and open it according to the diagram in your specific model’s guide.
Insert the required batteries (usually AA or AAA‚ quantity varies by model)‚ ensuring correct polarity as indicated inside the compartment. A secure fit is crucial for reliable operation. Once batteries are in place‚ the timer’s display should illuminate‚ indicating power. If not‚ double-check battery orientation and replace if necessary.
Now you are ready to proceed with connecting the timer to your faucet and irrigation system‚ following the subsequent steps for a fully functional setup.
Connecting to the Faucet
Ensure the faucet is turned off before attaching the Orbit Water Timer. Hand-tighten the timer securely onto the faucet spigot‚ avoiding the use of tools which could overtighten and damage the connection. A rubber washer is usually included; ensure it’s properly seated between the timer and the faucet to prevent leaks.
Once connected‚ slowly turn on the faucet‚ observing for any leaks around the connection point. If leaks occur‚ tighten the timer slightly‚ or check the washer’s positioning. Do not force the connection.
Proper faucet connection is vital for preventing water waste and ensuring the timer functions correctly. Proceed to connect the irrigation system only after a secure‚ leak-free faucet connection is established.
Connecting to the Irrigation System
After a secure faucet connection‚ attach your irrigation system (hose‚ sprinkler‚ drip system) to the outlet of the Orbit Water Timer. Ensure a snug fit‚ again hand-tightening is recommended to avoid damage to threads or connections.
Check for compatibility; the timer’s outlet size should match your irrigation system’s inlet. Using adapters may be necessary for certain setups. Slowly turn on the water‚ inspecting all connections for leaks.
Address any leaks immediately by tightening connections or verifying adapter seals. A properly connected irrigation system‚ coupled with a secure faucet connection‚ guarantees efficient and reliable watering.
Programming the Timer: Basic Operations
Easily set the current time and date‚ program watering duration‚ and select desired start times using the intuitive Easy-Set Logic technology for automated irrigation.
Setting the Current Time and Date
Accurate time and date settings are crucial for your Orbit timer to function correctly. Begin by pressing the “Set Clock” button – this initiates the time-setting process. Use the “Hour” and “Minute” buttons to adjust the current time. Ensure you observe the AM/PM indicator for correct time designation.
Next‚ set the date using the “Month‚” “Day‚” and “Year” buttons. Confirm each selection by pressing the “Set” button after each adjustment. Some models may require cycling through options. Double-check the displayed time and date to guarantee accuracy. Incorrect settings will lead to scheduling errors‚ impacting your lawn’s watering schedule. A properly set timer ensures efficient water usage and a healthy landscape.
Programming Watering Duration
Determining the appropriate watering duration is vital for plant health and water conservation. Access the watering duration setting by pressing the “Run Time” or similar designated button on your Orbit timer. Utilize the up and down arrow buttons‚ or the number pad if equipped‚ to specify the watering length in minutes.
Consider your plant types and local climate when setting the duration; shorter durations are suitable for established lawns‚ while longer times benefit new seed or thirsty plants. Avoid overwatering‚ which can lead to root rot and wasted water. Confirm your selection by pressing “Set” or “Enter.” Regularly review and adjust the duration based on seasonal changes and rainfall.
Selecting Start Times
Choosing optimal start times maximizes water efficiency and minimizes evaporation. Access the start time programming mode by pressing the “Start Time” or equivalent button on your Orbit timer. Use the arrow buttons or number pad to input your desired watering commencement time‚ typically expressed in AM or PM format.
Early morning watering (before 10 AM) is generally recommended to reduce water loss due to evaporation. Avoid watering during peak sunlight hours. You can often program multiple start times per day to accommodate different zones or plant needs. Confirm each start time entry with “Set” or “Enter‚” ensuring accurate scheduling for automated irrigation.
Advanced Programming Features
Explore multiple program options‚ rain delay settings‚ and seasonal adjustments for customized watering schedules‚ optimizing water usage based on weather and plant needs.
Multiple Program Options
Orbit timers offer versatile programming capabilities to suit diverse watering requirements. Users can establish independent programs – Program 1‚ Program 2‚ and so on – each with unique start times‚ durations‚ and watering days. This feature is invaluable for managing different zones within a yard‚ each potentially hosting varying plant types with distinct hydration needs.
For example‚ a lush flowerbed might require daily‚ shorter watering cycles‚ while a more drought-tolerant lawn could benefit from less frequent‚ longer sessions. The ability to create multiple programs eliminates the need for constant manual adjustments‚ ensuring optimal hydration for every area. Some models allow for up to three independent programs‚ providing substantial flexibility in irrigation management. This granular control promotes healthy plant growth and conserves water effectively.
Rain Delay Functionality
Orbit water timers are equipped with a convenient Rain Delay feature‚ preventing unnecessary watering during inclement weather and promoting water conservation. This function temporarily suspends the programmed watering schedule for a user-defined period‚ typically ranging from hours to several days. Activating the Rain Delay overrides the regular schedule‚ ensuring the landscape doesn’t become oversaturated during rainfall.
This is particularly useful when unexpected showers occur‚ or a forecast predicts prolonged wet conditions. Instead of relying solely on weather forecasts‚ the Rain Delay allows for proactive adjustments based on actual precipitation. The duration of the delay is easily adjustable‚ providing tailored control. Upon expiration of the delay‚ the timer automatically resumes the original programmed schedule‚ ensuring consistent irrigation.
Seasonal Adjustments
Orbit timers offer Seasonal Adjustment capabilities‚ allowing users to fine-tune watering schedules based on changing weather patterns throughout the year. As temperatures rise in the summer‚ plants typically require more water‚ while cooler autumn and spring months demand less. This feature enables a percentage-based increase or decrease in watering duration across all programmed zones.
Instead of manually adjusting each individual program‚ a single Seasonal Adjustment setting can modify the entire schedule‚ simplifying maintenance. For example‚ increasing the setting to 125% will extend all watering times by 25%. This ensures optimal hydration for plants without wasteful overwatering. Regularly adjusting for seasonal changes maximizes water efficiency and promotes healthy landscape growth.

Using the Manual Watering Feature
The manual mode overrides programmed schedules‚ providing immediate watering control for specific zones and durations‚ offering flexibility beyond automated settings.
Activating Manual Mode
To initiate manual watering‚ locate the “Manual” button on your Orbit timer. Pressing this button will immediately halt any currently running programmed cycle and transition the timer into manual operation. The display will typically indicate that manual mode is active‚ often with a specific icon or text message.
Depending on the model‚ you might need to press and hold the Manual button for a few seconds to confirm activation. Some timers feature a dedicated Manual setting within the menu‚ accessible by navigating with the up/down or program buttons. Once activated‚ the timer allows you to select which zone you wish to water and for how long‚ bypassing the pre-set schedule entirely. This is ideal for addressing immediate watering needs or testing individual zones.
Adjusting Manual Watering Duration
While in Manual mode‚ use the timer’s control buttons – typically “Up” and “Down” or “+” and “-” – to adjust the watering duration for the selected zone. The display will show the current manual watering time‚ which you can increment or decrement in minute or hour intervals‚ depending on the timer model.
Pay close attention to the displayed units to ensure you’re setting the desired watering length. Some timers allow for very precise adjustments‚ while others have larger step increments. Once you’ve set the desired duration‚ pressing the “Start” or “Enter” button will initiate watering for that length of time. The timer will automatically revert to the programmed schedule once manual watering concludes.
Returning to Programmed Schedule
After completing manual watering‚ the Orbit timer will generally return to its regularly programmed schedule automatically. However‚ some models may require a specific button press – often labeled “Schedule‚” “Program‚” or “Auto” – to confirm the return. Check your specific model’s display; it should indicate a return to the programmed state‚ often displaying the next scheduled watering time.
If the timer doesn’t revert automatically‚ consult the timer’s display or the full instruction manual for the correct procedure. Ensuring the timer is back on the programmed schedule is crucial for maintaining consistent and efficient irrigation‚ preventing over or under-watering of your lawn or garden.

Troubleshooting Common Issues
This section addresses frequent problems like incorrect time displays‚ water flow disruptions‚ and scheduling errors‚ offering solutions for optimal timer performance.
Timer Not Displaying Correct Time
If your Orbit timer shows an incorrect time‚ begin by verifying the battery level; low batteries are a common culprit. Replace them with fresh ones to ensure proper operation. Next‚ carefully re-enter the current time and date using the timer’s programming buttons‚ referencing a reliable time source.
Ensure you’ve selected the correct AM or PM designation during setup. Some models may have a 24-hour clock option – confirm your preference. If the issue persists after these steps‚ try resetting the timer to its factory defaults (consult your specific model’s instructions for this process) and then reprogram it from scratch. A power surge or brief interruption could also cause time discrepancies‚ so consider this possibility.
Water Not Flowing Through the Timer
If water isn’t flowing through your Orbit timer‚ first check the faucet connection to ensure it’s fully open and there are no kinks in the hose. Inspect the timer’s inlet screen for debris or sediment buildup‚ carefully cleaning it if necessary. Verify that the irrigation system’s valves are also open and functioning correctly.
A clogged filter within the timer itself can restrict water flow; disassemble and rinse the filter according to the manual’s instructions. Examine the timer’s internal components for any visible obstructions. If the water pressure is exceptionally low‚ this could also be the cause – ensure adequate pressure is reaching the timer. Finally‚ confirm the programmed schedule isn’t preventing water flow.
Program Not Running as Scheduled
If your Orbit timer isn’t following the programmed schedule‚ double-check the current time and date settings for accuracy. Ensure the start times are correctly entered and haven’t been inadvertently changed. Verify the watering duration is set appropriately for each zone or program. A Rain Delay function might be active‚ temporarily suspending the schedule – deactivate it if not needed.
Inspect the battery level; low batteries can cause erratic behavior. Confirm there are no conflicting programs overriding the intended schedule. If using a B-hyve timer‚ check the app for any overrides or schedule changes made remotely. Finally‚ a power outage could have reset the timer‚ requiring reprogramming.

Orbit B-hyve Smart Hose Watering Timer
The B-hyve timer offers Wi-Fi connectivity and control via a mobile app‚ enabling remote scheduling‚ monitoring‚ and adjustments for optimal water management.
Connecting to Wi-Fi
To connect your Orbit B-hyve timer to Wi-Fi‚ begin by downloading and installing the B-hyve mobile app on your smartphone or tablet. Ensure your home’s 2.4 GHz Wi-Fi network is active and you have the password readily available.
Within the app‚ create an account or log in if you already have one. Follow the in-app instructions to add a new device‚ selecting the B-hyve timer model. The app will guide you through putting the timer into pairing mode‚ typically by pressing and holding a specific button on the device.
The app will then search for the timer and prompt you to enter your Wi-Fi network credentials. Once connected‚ the timer will synchronize with the app‚ allowing for remote control and monitoring of your watering schedule. A successful connection is usually indicated by a solid Wi-Fi indicator light on the timer itself.
Using the B-hyve Mobile App
The B-hyve app provides a user-friendly interface for complete control of your Orbit smart timer. From the app’s dashboard‚ you can view the current watering schedule‚ adjust start times‚ and modify watering durations for each zone.
Explore the app’s features to create customized watering programs based on plant type‚ soil conditions‚ and local weather patterns. Utilize the “Smart Watering” feature‚ which automatically adjusts schedules based on real-time weather data‚ conserving water and promoting healthy plant growth.
The app also allows for manual watering‚ rain delay activation‚ and remote monitoring of water usage. Receive notifications regarding schedule changes‚ low battery alerts‚ and potential issues with your irrigation system directly on your mobile device.
Remote Control and Monitoring
With the B-hyve app‚ control your Orbit timer from anywhere with a Wi-Fi connection. Initiate watering cycles‚ pause schedules‚ or make adjustments while away from home‚ ensuring your lawn and garden receive the necessary hydration‚ even during travel.
The app provides real-time monitoring of water usage‚ displaying historical data and current consumption patterns. This feature helps identify potential leaks or inefficiencies in your irrigation system‚ promoting water conservation and reducing your water bill.
Receive instant alerts regarding schedule changes‚ low battery warnings‚ or any detected issues with the timer’s operation. Enjoy peace of mind knowing you can manage your irrigation system effectively‚ regardless of your location.

Maintaining Your Orbit Water Timer
Proper winterization‚ cleaning‚ and battery replacement are crucial for extending the lifespan and ensuring optimal performance of your Orbit water timer system.
Winterizing the Timer
As freezing temperatures approach‚ protecting your Orbit water timer is essential to prevent damage. First‚ disconnect the timer from the faucet and irrigation system.
Next‚ thoroughly drain all water from the timer body and hoses; residual water can freeze and crack internal components. Remove the batteries to prevent corrosion during prolonged storage.
Store the timer indoors in a dry‚ frost-free location. Avoid storing it in unheated garages or sheds where temperatures can drop below freezing.
Inspect hoses for cracks or weaknesses before storing them as well. Proper winterization ensures your timer is ready for use when the watering season returns‚ saving you replacement costs and hassle.
Cleaning and Storage
Regular cleaning extends the life of your Orbit water timer. Before storing‚ wipe down the exterior with a damp cloth to remove dirt and debris. Avoid using harsh chemicals or abrasive cleaners‚ as these can damage the plastic casing.
Inspect the connections for mineral buildup; a mild vinegar solution can help dissolve deposits‚ but rinse thoroughly afterward.
Ensure the timer is completely dry before storing it. Store in a cool‚ dry place‚ away from direct sunlight and extreme temperatures.
Keeping the timer in its original packaging‚ or a similar protective container‚ can prevent damage during storage. Proper cleaning and storage contribute to reliable performance season after season.
Replacing Batteries
Low battery power can cause inaccurate timekeeping or timer malfunction. Replace batteries annually‚ or when the low battery indicator appears on the display. Use fresh alkaline batteries of the correct size‚ as specified in your timer’s model documentation.
Carefully open the battery compartment‚ typically located on the timer’s face or side. Remove the old batteries‚ noting the correct polarity (+ and -).
Insert the new batteries‚ ensuring proper alignment. Close the battery compartment securely. Reset the time and date after replacing the batteries to ensure accurate scheduling.
Dispose of used batteries responsibly‚ following local regulations for battery recycling.
Safety Precautions
Always observe electrical safety‚ manage water pressure appropriately‚ and protect the timer from physical damage to ensure safe and reliable operation.
Electrical Safety
Orbit water timers operate on low-voltage power‚ typically using batteries. However‚ it’s crucial to exercise caution when handling the device and its power source.
Always ensure your hands are dry before installing or replacing batteries. Avoid exposing the timer to excessive moisture‚ as this could compromise the electrical components and create a potential hazard.
Never attempt to disassemble or modify the timer’s internal circuitry. If the timer is damaged‚ do not use it and contact Orbit customer support for assistance.
When using timers connected to an outdoor power source (for certain B-hyve models)‚ ensure the outlet is properly grounded and protected by a ground fault circuit interrupter (GFCI).
Water Pressure Considerations
Orbit water timers are designed to function effectively within a specific water pressure range‚ typically between 20 and 100 PSI.
Excessively high water pressure can damage the timer’s internal components‚ leading to leaks or malfunctions. If your water pressure exceeds 100 PSI‚ it’s recommended to install a pressure regulator valve before the timer.
Conversely‚ insufficient water pressure may prevent the timer from operating correctly‚ resulting in reduced water flow or incomplete watering cycles.
Ensure your water source provides adequate pressure for optimal timer performance. Regularly check for any obstructions in the water line that could restrict flow.
Avoiding Timer Damage
To prolong the life of your Orbit water timer‚ protect it from extreme temperatures and physical impacts.
Avoid exposing the timer to direct sunlight for extended periods‚ as this can degrade plastic components.
During freezing weather‚ disconnect the timer and store it indoors to prevent damage from ice expansion.
Do not attempt to disassemble the timer beyond the battery compartment‚ as this will void the warranty and could introduce malfunctions.
Handle the timer with care‚ avoiding drops or forceful impacts. Regularly inspect the unit for cracks or damage and address any issues promptly.